Since this is a fictitious system there is no real aerial or Google Maps/Earth image that can be loaded in as a further backdrop to the modelling. However, for illustration purposes we shall load a geospatially positioned image of a concrete ground level tank as a backdrop on the location of the tank.
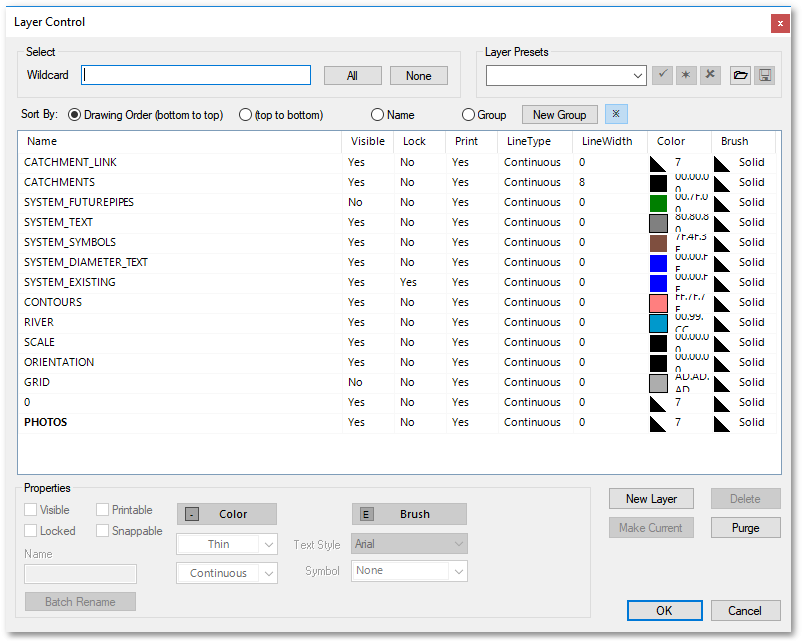
The bitmap image will be imported into the drawing, on a new layer called PHOTO. This layer now has to be created via CAD > Tools > Layer Manager. The Layer Control box will appear. Click New Layer button, and enter the new layer's name: viz. PHOTO. Click OK. To prevent that the raster background is drawn over the other plans, the PHOTO layer should be moved to the bottom of the drawing order, ensuring that it is drawn before other layers. Check that the Drawing Order (bottom to top) is set near the top right and then drag (left-click and move the mouse while keeping the button depressed) the layer PHOTO to just above layer 0. Now click on Make Current button, which will make PHOTO the current layer. New objects always get created on the current layer. Click OK to close the Layer Control box:
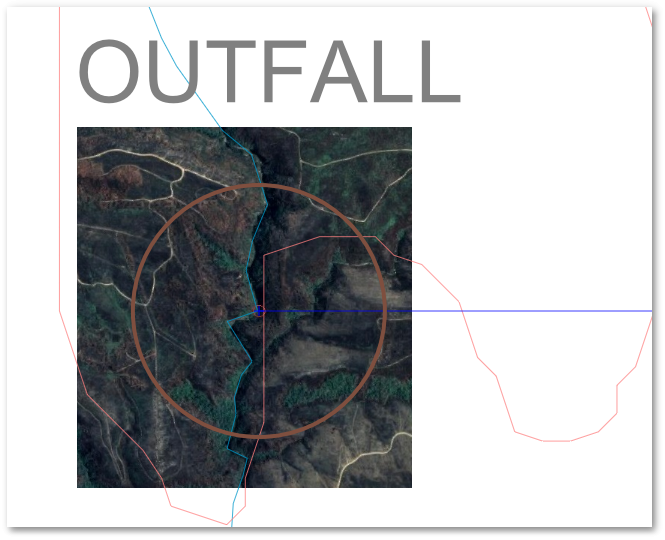
The next step is to import the bitmap image. Zoom to the vicinity of the ground level tank symbol near the right of the drawing. Select CAD > Insert > Bitmap and click the Browse button to browse to Documents\GLS\HydroSWMM6\ - HydroSWMM Tutorial Image.jpg. Click OK. The settings in the Insert Bitmap window will automatically be set from the image’s accompanying world file* which specifies its location and scale. After pressing OK the zoomed in screen should look like this, with the tank image at the exact location of the tank symbol:
(* Note, this image when loaded in appears automatically at the correct location, because it has an associated .JPW text file (alternatively a special geo-tiff with built-in geographical coordinates could also have been provided). If, however, the image is a standard tiff file or has no accompanying world file (with geo-referencing information such as a JPG with JPW file or TIF with TFW), then the user has to define these settings. If there is no information available on the real world coordinate of the top left position of the image, then simply accept the default 0 values for this setting and only specify further the DPI and Scale settings. The image will then appear correctly according to scale, but will usually be in the wrong coordinate system that does not match with the other data layers in the project. It is, however, easy to fix the image to real world coordinates (or some other project specific coordinate system) by simply specifying the coordinates for two known points on the image. This can be accomplished by following the exact same procedure as for fixing background drawings, which was discussed in a previous section).