Select Node(Junction) 5 and right-click to open the following pop-up menu. In the list of options in the menu, choose Edit Junction as shown. You will find an option Convert to Outfall. The entire step is shown below:
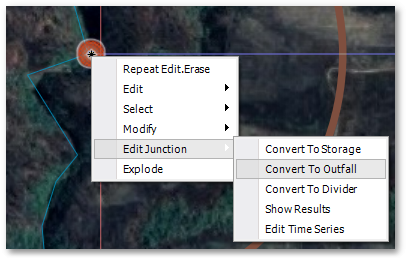
This will result in Node 5 changing to a type Outfall and as such will be drawn with a special Outfall symbol (as per the default theme).
For now, you will have to zoom in quite extensively to see these icons.
The procedure for changing Outfall symbol sizes is currently as follows. Changing the sizes is normally not required, but for this example model can be done as follows:
Right-click on St_Outfall_Tables in the GIS Layer Manager > Render Settings.
Click on the Outfall icon, then change Symbol Size to 150 (m), followed by OK.
The Outfall symbol should now be clearly visible.